maven central release with github in 30 seconds
Uploading Snapshots and Releases to Maven Central with TravisCI
As a passionate developer I always strive to optimise my build chain for speed and simplicity. In this example I’d like to publish a library on maven central without any onsite build tooling except my IDE. So lets see how to get rid of gpg key management and implement a trivial push-button release process with Github and TravisCI.
(This is reblogged originally from idealo/logback-redis/wiki/Release-Process and sponsored by Idealo)
We based the release process on this tutorial and simplified the process by using adhoc created gpg keys just once, so there is no hassle with key management.
For a working example, you may check out our project logback-redis
TLDR; Release with just pushing a git tag or pressing ‘create release’ in Github.
Basically you have 3 steps (OSSRH Guide):
- Create a Jira Account at Sonatype
- Create a Project Ticket
- Deploy to https://oss.sonatype.org/content/repositories/snapshots
or https://oss.sonatype.org/service/local/staging/deploy/maven2/.
Therefor you need to:
- Modify your pom.xml
- Add build plugins for binaries, javadoc and sources jar files and gpg signing
- (Creation of a gpg key and signing your builds is done implicitly)
- Integrate this with travis secured environment variables
Setup
Add general information to your pom.xml
You need to add the following parts to your pom.xml. There are
detailed explanations of these configuration values at
sonatype.org.
This general information needs to be available (e.g. a missing description tag will make deployment to maven central impossible):
<groupId>org.example.spring</groupId>
<artifactId>my-library</artifactId>
<packaging>jar</packaging>
<version>0.1.0-SNAPSHOT</version>
<name>my-library</name>
<url>https://example.org</url>
<description>A good description</description>
Also the developer and license information is necessary:
<developers>
  <developer>
    <id>jd</id>
    <name>Joe Doe</name>
    <email>joe.doe@example.org</email>
    <url>https://example.org</url>
  </developer>
</developers>

<licenses>
  <license>
    <name>MIT</name>
    <url>https://opensource.org/licenses/MIT</url>
    <distribution>repo</distribution>
  </license>
</licenses>
Add distributionManagement for ossrh to your pom.xml
The following two entries are given to you, as soon as you finish step 1 and 2 at sonatype’s jira:
<distributionManagement>
  <snapshotRepository>
    <id>ossrh</id>
    <url>https://oss.sonatype.org/content/repositories/snapshots</url>
  </snapshotRepository>
  <repository>
    <id>ossrh</id>
    <url>https://oss.sonatype.org/service/local/staging/deploy/maven2/</url>
  </repository>
</distributionManagement>
You will need to add them in your pom.
Once set up, the maven deploy task will know the target for uploads.
Add maven build plugins
For a successful upload to maven central you need your jar, a java doc
jar, a java sources jar and all of those need to be signed with a gpg
key. The following configuration in your pom.xml will take care of
those steps:
<profiles>
  <profile>
      <id>release</id>
      <build>
        <plugins>
            <plugin>
                <groupId>org.sonatype.plugins</groupId>
                <artifactId>nexus-staging-maven-plugin</artifactId>
                <version>1.6.7</version>
                <extensions>true</extensions>
                <configuration>
                    <serverId>ossrh</serverId>
                    <nexusUrl>https://oss.sonatype.org/</nexusUrl>
                    <autoReleaseAfterClose>true</autoReleaseAfterClose>
                </configuration>
            </plugin>
            <plugin>
              <groupId>org.apache.maven.plugins</groupId>
              <artifactId>maven-source-plugin</artifactId>
              <version>2.2.1</version>
              <executions>
                <execution>
                  <id>attach-sources</id>
                  <goals>
                    <goal>jar-no-fork</goal>
                  </goals>
                </execution>
              </executions>
            </plugin>
            <plugin>
              <groupId>org.apache.maven.plugins</groupId>
              <artifactId>maven-javadoc-plugin</artifactId>
              <version>2.9.1</version>
              <executions>
                <execution>
                  <id>attach-javadocs</id>
                  <goals>
                    <goal>jar</goal>
                  </goals>
                </execution>
              </executions>
            </plugin>
            <plugin>
              <groupId>org.apache.maven.plugins</groupId>
              <artifactId>maven-gpg-plugin</artifactId>
              <version>1.6</version>
              <executions>
                <execution>
                  <id>sign-artifacts</id>
                  <phase>verify</phase>
                  <goals>
                    <goal>sign</goal>
                  </goals>
                </execution>
              </executions>
            </plugin>
        </plugins>
      </build>
    </profile>
  </profiles>
Creating GPG-Keys
We create our temporary GPG-Keys on-the-fly with the following script (.travis/gpg.sh):
#!/usr/bin/env bash

set -e

# create a random passphrase
export GPG_PASSPHRASE=$(echo "$RANDOM$(date)" | md5sum | cut -d\  -f1)

# configuration to generate gpg keys
cat >gen-key-script <<EOF
    %echo Generating a basic OpenPGP key
    Key-Type: RSA
    Key-Length: 4096
    Subkey-Type: 1
    Subkey-Length: 4096
    Name-Real: Opensource Idealo
    Name-Email: opensource-logback-redis@idealo.de
    Expire-Date: 2y
    Passphrase: ${GPG_PASSPHRASE}
    %commit
    %echo done
EOF

# create a local keypair with given configuration
gpg --batch --gen-key gen-key-script


# export created GPG key
#
# example output
# sec   4096R/EDD32E8B 2016-09-08 [verfällt: 2018-09-08]
# uid                  Lars K.W. Gohlke <lars.gohlke@idealo.de>
# ssb   4096R/CC1613B2 2016-09-08
# ssb   4096R/55B7CAA2 2016-09-08
export GPG_KEYNAME=$(gpg -K | grep ^sec | cut -d/  -f2 | cut -d\  -f1 | head -n1)

# cleanup local configuration
shred gen-key-script

# publish the gpg key
# (use keyserver.ubuntu.com as travis request keys from this server,
#  we avoid synchronization issues, while releasing)
gpg --keyserver keyserver.ubuntu.com --send-keys ${GPG_KEYNAME}

# wait for the key beeing accessible
while(true); do
  date
  gpg --keyserver keyserver.ubuntu.com  --recv-keys ${GPG_KEYNAME} && break || sleep 30
done
This will provide maven with a key pair to sign our artifacts.
Signing is mandatory with sonatype.
Create a settings.xml for the travis build
The following settings.xml should be available in your git repository at
.travis/settings.xml:
<settings xmlns="http://maven.apache.org/SETTINGS/1.0.0"
xmlns:xsi="http://www.w3.org/2001/XMLSchema-instance"
xsi:schemaLocation="http://maven.apache.org/SETTINGS/1.0.0
http://maven.apache.org/xsd/settings-1.0.0.xsd">
<servers>
<server>
<!-- Maven Central Deployment -->
<id>ossrh</id>
<username>${env.SONATYPE_USERNAME}</username>
<password>${env.SONATYPE_PASSWORD}</password>
</server>
</servers>
<profiles>
<profile>
<id>ossrh</id>
<activation>
<activeByDefault>true</activeByDefault>
</activation>
<properties>
<gpg.executable>gpg</gpg.executable>
<gpg.passphrase>${env.GPG_PASSPHRASE}</gpg.passphrase>
</properties>
</profile>
</profiles>
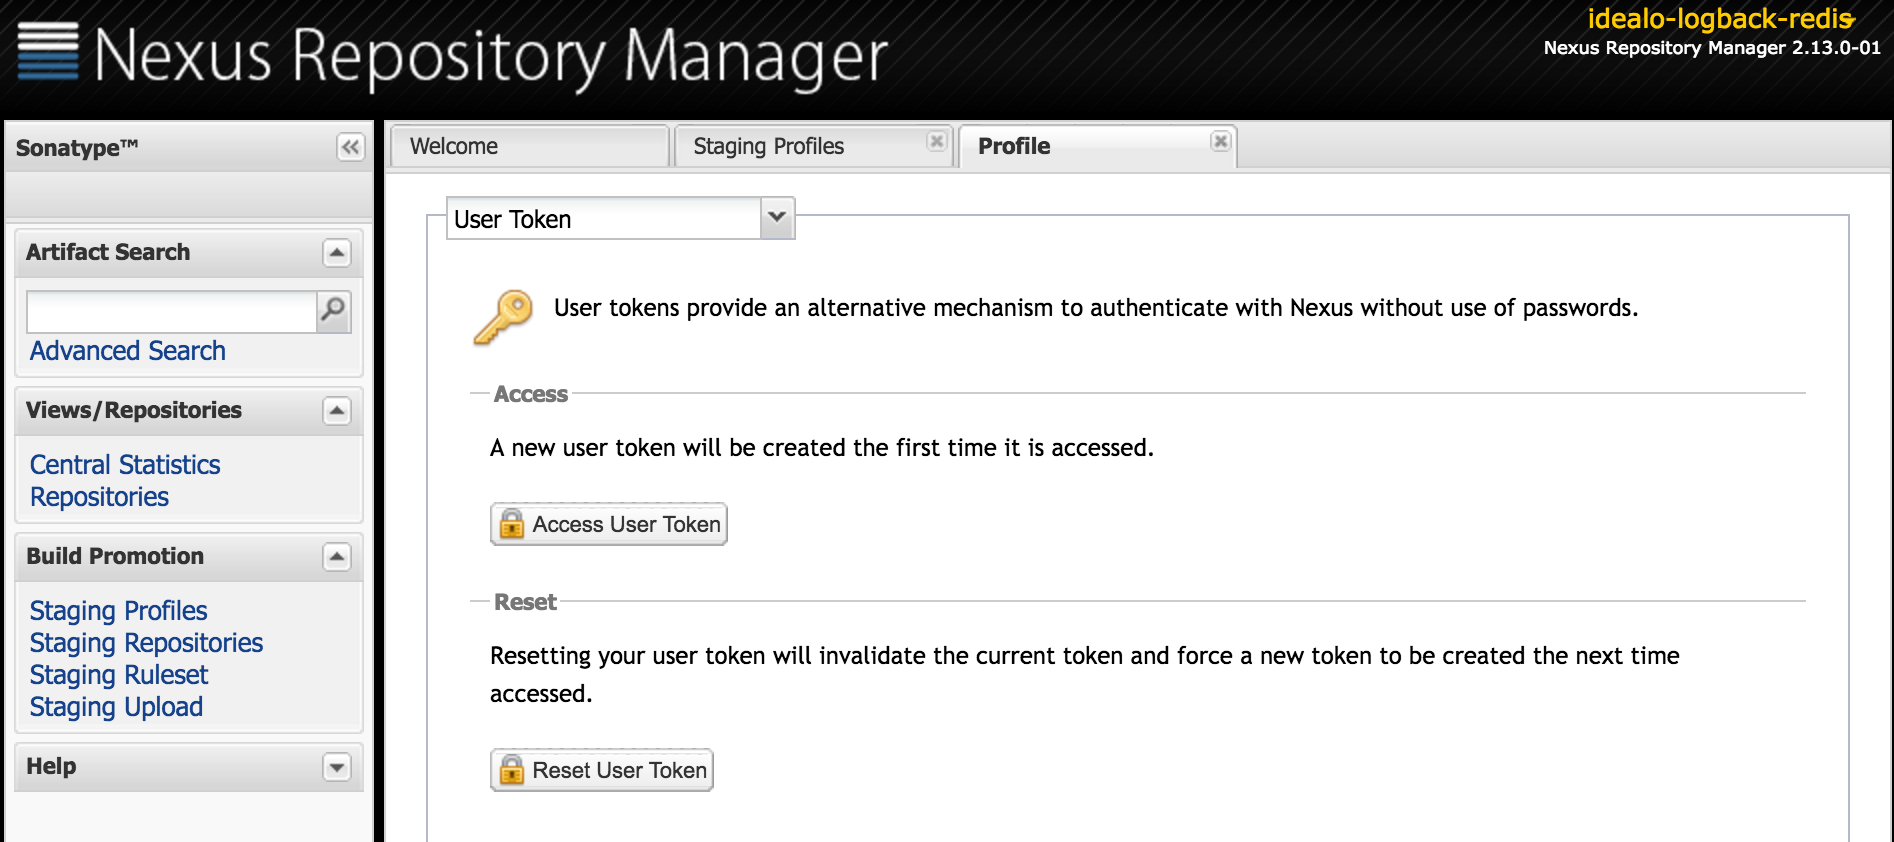
</settings>As you can see we’ll use environment-variables to configure passphrase and sonatype password. (Those are tokens, not your real account passwords. See below.)
Add the secrets to your Travis Settings Page
If your project is already on travis, you need to add the environment
variables on the settings page. For example, for the logback-redis project
under idealo namespace, the url looks like this:
https://travis-ci.org/idealo/logback-redis/settings.
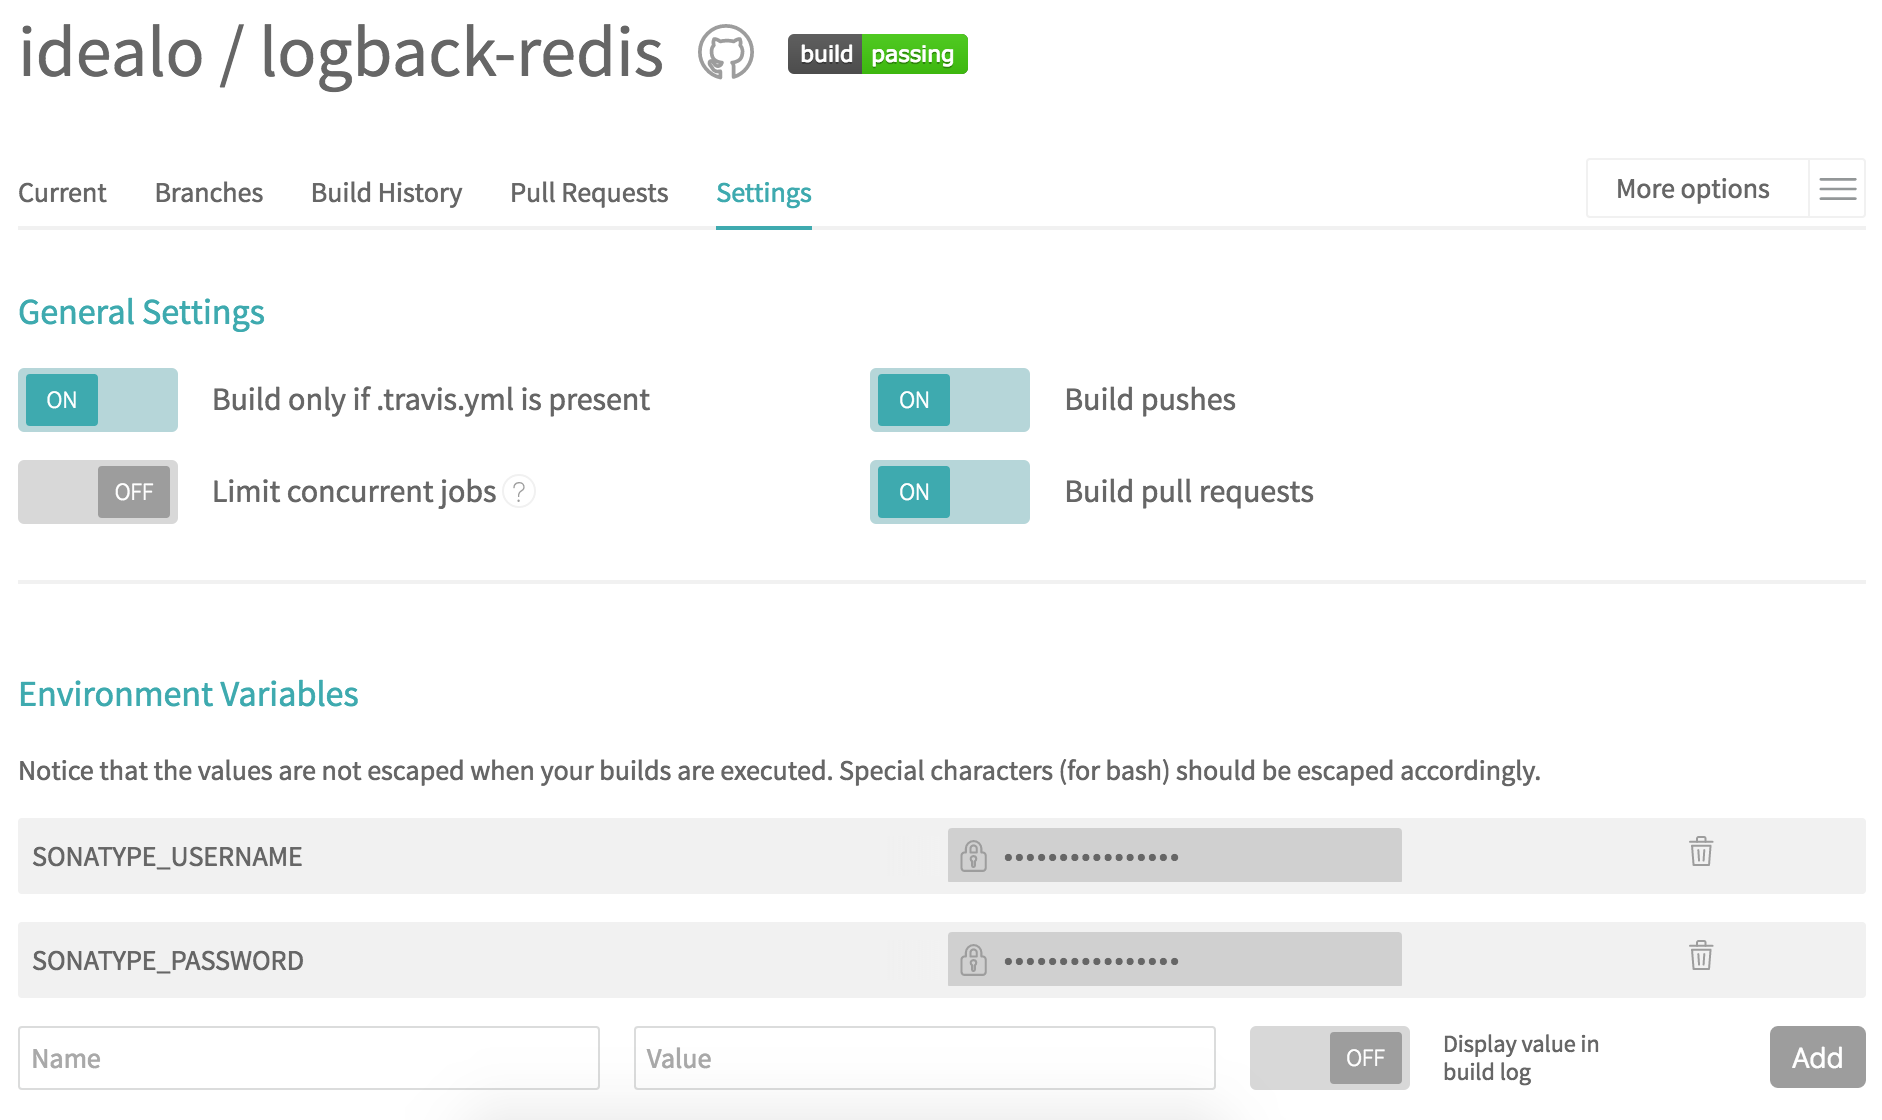
Fill SONATYPE_USERNAME and SONATYPE_PASSWORD with your tokens (NOT your actual credentials).
Add .travis.yml
Your .travis.yml file could look like this:
language: java

jdk:
  - oraclejdk8

script: mvn --settings .travis/settings.xml clean  verify

deploy:
  -
    provider: script
    script: .travis/deploy.sh
    skip_cleanup: true
    on:
      repo: idealo/logback-redis
      tags: true
      jdk: oraclejdk8


notifications:
  email:
    - opensource-logback-redis@idealo.de
It’s very important to override the install instruction for mvn with
--settings .travis/settings.xml, otherwise your settings.xml will be
ignored and the configuration would be useless.
Add .travis/deploy.sh
Since it’s easier to read if you have all deploy steps in a separate
file, I created a .travis/deploy.sh for this:
#!/usr/bin/env bash

set -e

# only do deployment, when travis detects a new tag
if [ ! -z "$TRAVIS_TAG" ]
then
    echo "on a tag -> set pom.xml <version> to $TRAVIS_TAG"
    mvn --settings .travis/settings.xml org.codehaus.mojo:versions-maven-plugin:2.3:set -DnewVersion=$TRAVIS_TAG -Prelease

    if [ ! -z "$TRAVIS" -a -f "$HOME/.gnupg" ]; then
        shred -v ~/.gnupg/*
        rm -rf ~/.gnupg
    fi

    source .travis/gpg.sh

    mvn clean deploy --settings .travis/settings.xml -DskipTests=true --batch-mode --update-snapshots -Prelease


    if [ ! -z "$TRAVIS" ]; then
        shred -v ~/.gnupg/*
        rm -rf ~/.gnupg
    fi
else
    echo "not on a tag -> keep snapshot version in pom.xml"
fi
This snippet sets the version in the pom file to the tag version (if it’s a git tag aka release). Afterwards a deploy will be triggered only if it is a release.
That’s why in my pom.xml there is always a -SNAPSHOT qualifier
and no final MAJOR.MINOR.PATCH version, yet. This part takes care of
creating a SemVer version of the pom.xml.
Result
If you set this up correctly, your setup will work like this:
- In your
pom.xmlyou have<version>0.1.0-SNAPSHOT</version> - If you push a commit to master of your repository only the tests will run.
- If you
git tag 0.1.0andgit push --tagsafterwards, you will have0.1.0of your library available at maven central.